Select the desired Evaluation method from the combobox "Method of Analysis".
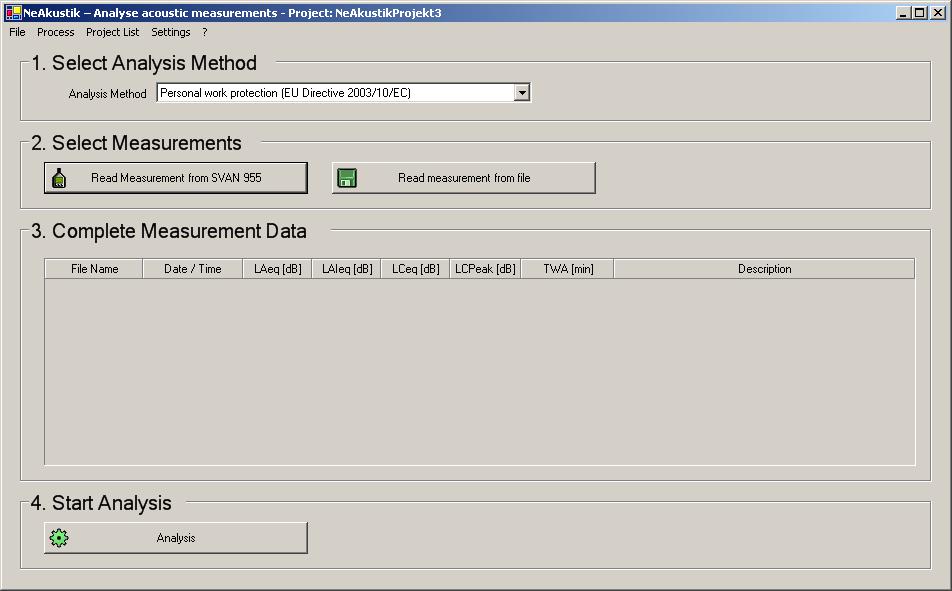
Click the button labelled "Measurement read from". A dialogue will then appear from which you can choose which level meter measurement you would like to read in.
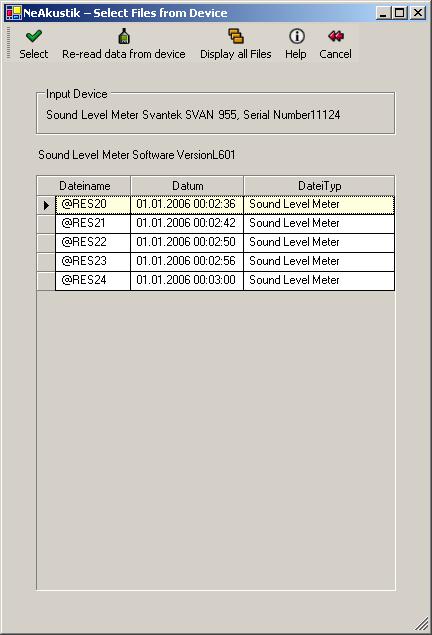
Select the desired measurement by clicking on the corresponding row in the table. If you keep the Ctrl key pressed while you click the
rows, you can select several measurements simultaneously. If you keep the Shift key pressed while selecting a measurement and then select a second measurement all measurements will be marked.
Click the OK-Button to add data to the project. The data will be inserted.
Complete the measurement entries within the table. (Depending upon selected analysis method, for example with Personal Work Protection: Time-Weighted Average, as well as a description of the measurements, e.g. measurement location).
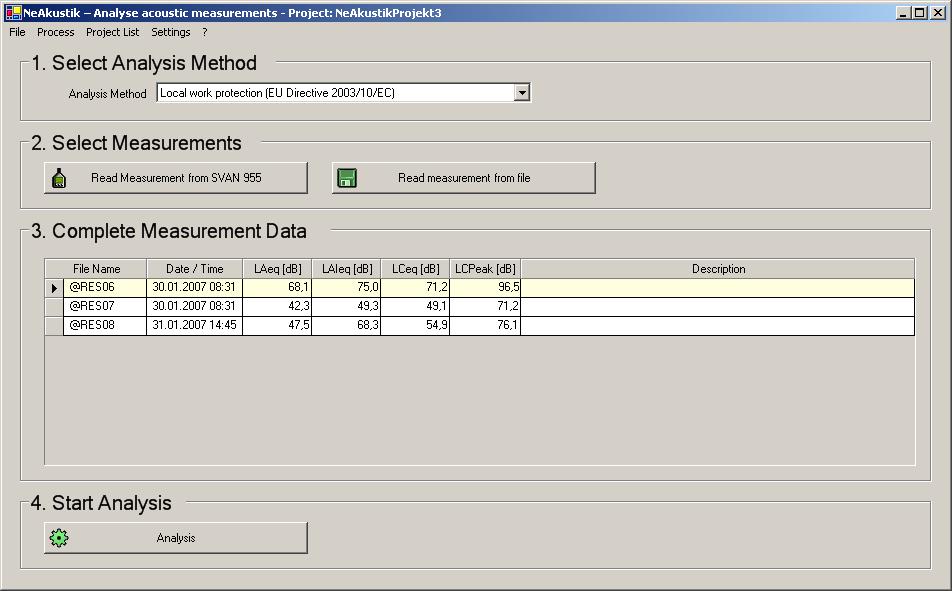
If you click in the grey field, on the left beside the file name, in the table, the measurement-info dialogue will appear. All results of the measurement are listed in the dialogue (see chapter "View Measurement Information"), further actions which would otherwise be found in the menu, can be accomplished with a right mouse-click on a row).
Click the button "Analysis"
The dialogue for inputting general project data will appear.
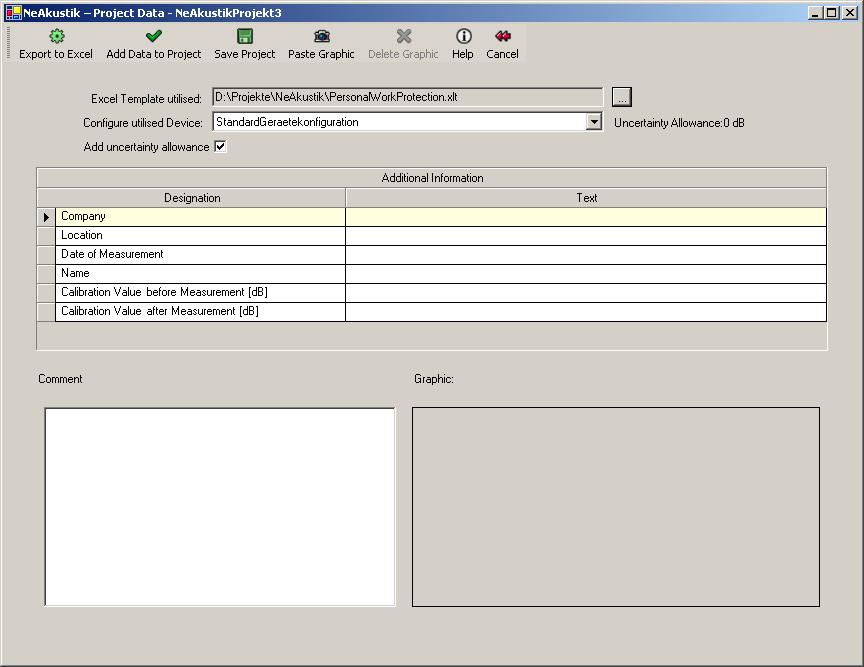
The additional information appearing in the table is the data which is defined in the selected template. If you enter this additional information it will be inserted in the desired places within the evaluation.
Please indicate whether you wish to add the uncertainty allowance relevant to the precision class of the level meter.
If in the selected Excel Template is so defined, a graphic may be inserted. The appropriate button in the dialogue will then be active.
By clicking the button "Add Data to Project" you can save the project to your hard disk at any time.
Click the Button "Export to Excel". The project will then be saved to the hard drive and the evaluation will be carried out. This may take a moment. An appropriate message will be displayed in the bottom left of the dialogue.
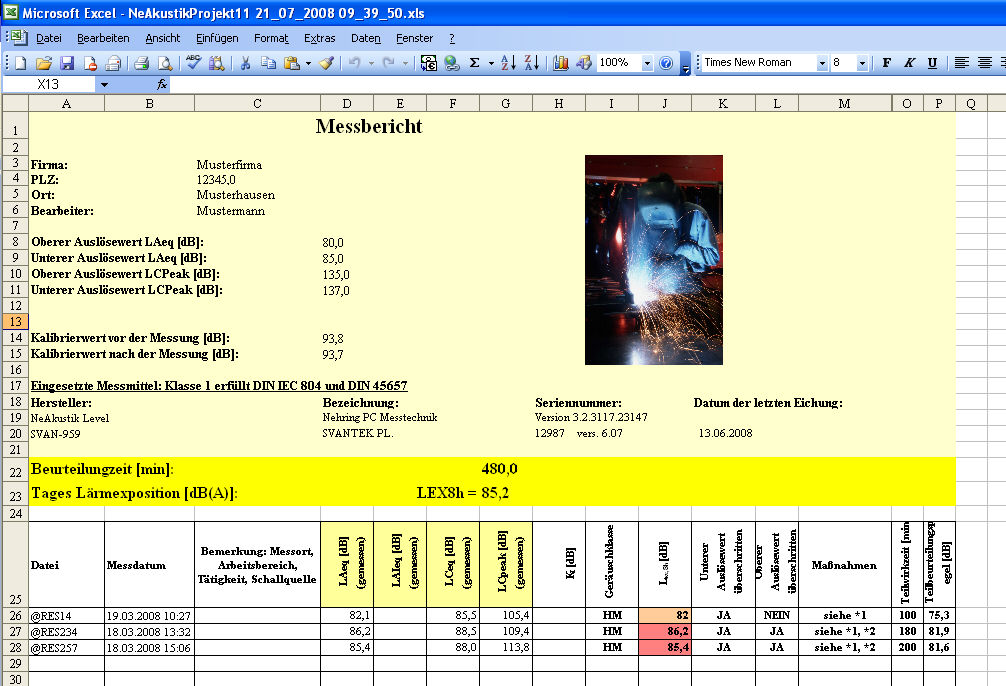
When the evaluation is finished the Excel workbook will appear on the screen.